Network Patch Cords
Cat5e, Cat6 & Cat8 - Cords Available In: 1' to 100' Lengths & 9 Colors
0.0 / 5
Network Patch Cords Features
- 350Mhz (cat5e) 550Mhz (Cat6) 2000Mhz (Cat8)
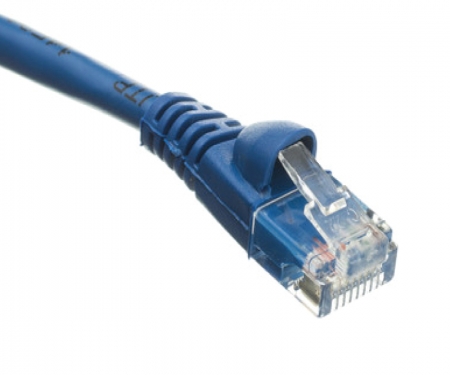
- Mold-Injection-Snagless Patch Cord
- Molded With Boot & Bubble
- 50 Micron Gold RJ45s with Boots on Each End
- TIA/EIA 568A T568B Wired
- Unshielded Twisted Pair (Cat5e & Cat6) and shielded (cat8)
- 24 AWG 4 pair Stranded Copper
- Multiple colors for Easy Identification
- Transmits at up to 1000 Mbps
- Cat8 transmits at up to 40 Gbit/s
- Compatible With 100 Base / 1000 Base T (gigabit) Networks
- UL/ETL Listed
Cat5E and Cat6 patch cords are compliant with the latest standards, meeting and exceeding a full range of patching performance requirements. Our patching network cables contain RJ45s with Boots on each end and are available in multiple colors.
Cat8 cabling was designed primarily for high-speed data centers where switches, servers, and other network hardware are located in close proximity. This newest copper communications cable offers greater flexibility both literally and in distances when compared to QSFP+ and Twinax DAC assemblies which typically cost significantly more and are often much more limited in scope. It has the reach to cover Top-of-Rack and End-of-Row or Middle-of-Row network topologies while delivering 10, 25, and 40 Gigabit data rates over BASE-T technology with RJ45 ends making it a drop-in replacement for Cat6a where rates beyond 10Gb will be needed today or in the future. Cat8 has stricter specifications for noise restriction and crosstalk than any of its predecessors. The individual conductors are 24 AWG (American wire gauge) stranded pure copper. Cat8 patch cables are stranded to improve flexibility. Pure copper conductors provide the best signal possible. Each pair of conductors is shielded with an aluminum mylar foil to reduce, if not eliminate, crosstalk. These cables also have a braided shield, which protects from outside electromagnetic interference.
Are we missing the specification you need? Please go to our Contact Us page and submit your question to us, or call 1-877-284-7760
Have a question that is not answered here? Please go to our Contact Us page and submit your question to us.
Looking for a quotation ? We would be happy to help by providing a quick response, inventory status, and Volume Level pricing, when available. Please fill out the form below and a representative will be in touch with you within hours to one business day to answer any questions and quote your request.
Product Details
Cat5E and Cat6 patch cords are compliant with the latest standards, meeting and exceeding a full range of patching performance requirements. Our patching network cables contain RJ45s with Boots on each end and are available in multiple colors.
Cat8 cabling was designed primarily for high-speed data centers where switches, servers, and other network hardware are located in close proximity. This newest copper communications cable offers greater flexibility both literally and in distances when compared to QSFP+ and Twinax DAC assemblies which typically cost significantly more and are often much more limited in scope. It has the reach to cover Top-of-Rack and End-of-Row or Middle-of-Row network topologies while delivering 10, 25, and 40 Gigabit data rates over BASE-T technology with RJ45 ends making it a drop-in replacement for Cat6a where rates beyond 10Gb will be needed today or in the future. Cat8 has stricter specifications for noise restriction and crosstalk than any of its predecessors. The individual conductors are 24 AWG (American wire gauge) stranded pure copper. Cat8 patch cables are stranded to improve flexibility. Pure copper conductors provide the best signal possible. Each pair of conductors is shielded with an aluminum mylar foil to reduce, if not eliminate, crosstalk. These cables also have a braided shield, which protects from outside electromagnetic interference.
Product Specifications
Are we missing the specification you need? Please go to our Contact Us page and submit your question to us, or call 1-877-284-7760
Product Manuals
Frequently Asked Questions
Have a question that is not answered here? Please go to our Contact Us page and submit your question to us.


